Description
PRODUCT DESCRIPTION
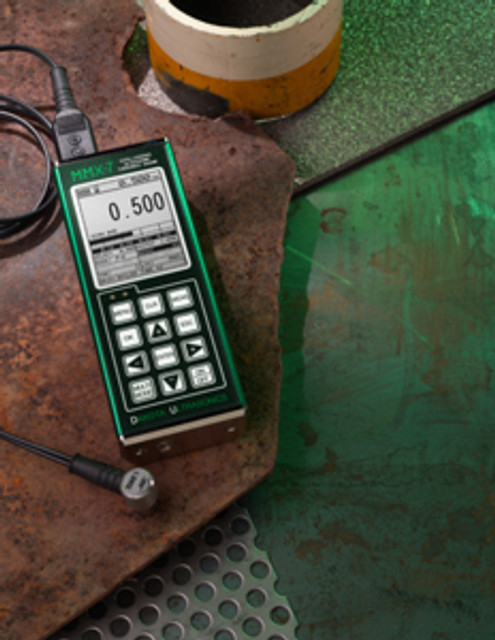
The MMX-7 v2.0 has all features of the ZX gauges with some additional features and advantages. Selectable Large Digits and B-Scan display options, internal 4Gb SD memory, alpha numeric data storage format, 64 user custom definable setups, transducer list for improved linearity, echo-echo thru paint with the single press of a button, multiple calibration and selectable material type options, and more. This is all nicely packaged in a very mini portable aluminum extrusion for extra durability and portability! Our java based DakView PC or MAC OSX software and USB-C connectivity makes this thing a complete kit!
Applications
|
| Corrosion & Pitting |
Boilers |
| Tube & Pipe |
Glass |
| Tanks |
Variety of Applications |
Specifications
|
PHYSICAL
- Weight: 13.5 ounces (with batteries).
- Size: 2.5 W x 6.5 H x 1.24 D inches (63.5 W x 165 H x 31.5 D mm).
- Operating Temperature: -14° to 140°F (-10° to 60°C).
- Keyboard: Membrane switch with twelve tactile keys.
- Case: Extruded aluminum body with nickel-plated aluminum end caps (gasket sealed).
- Display: 1/8 in. VGA grayscale display (240 x 160 pixels); Viewable area 2.4 x 1.8 in. (62 x 45.7mm). EL backlit (on/off/auto/invert).
ULTRASONIC SPECIFICATIONS
- Measurement Modes: Pulse-Echo (flaws, pits)
- Echo-Echo (thru-paint).
- Pulser: 150 volt square wave pulser.
- Receiver: Manual or AGC gain control with 50dB range, depending on mode selected.
- Timing: Precision TCXO timing with single shot 100MHz 8 bit ultra low power digitizer.
POWER SOURCE
- Line Power: USB-C to PC or power outlet.
- Batteries: Three AAA cells. Alkaline – 35 hrs, Nicad – 10 hrs and NI-MH – 35 hrs.
- Auto power off if idle 5 min.
- Battery status icon.
|
MEASURING
- Range:
- Pulse-Echo Mode (P-E) – (Pit & Flaw Detection) measures from 0.025 in. to 100 ft. (0.63 mm to 30.48 Meters).
- Echo-Echo Mode (E-E): Thru Paint & Coatings) measures from 0.100 to 6.0 in. (2.54 to 152.4 mm).
- Range will vary +/- depending on the thickness of coating.
- Resolution: +/- .001 inches (0.01 mm)
- Velocity Range: .0122 to .7300 in./ms 309.88 to 18542 meters/sec
- Single and Two point calibration option, or selection of basic material types.
- Units: English & Metric
DISPLAY
- Display Views:
- Large Digits: standard thickness view; Digit Height: 0.700 in (17.78mm).
- B-Scan: Cross section view. Display speed variable (10 to 200 readings per second).
- Scan Bar: Speed 10Hz. Viewable in B-Scan and Large Digit views.
- Bar Graph: Indicates stability of measurement. Viewable in B-Scan and Large Digit views.
MEMORY:
- Data Structure: Grid (alpha numeric).
- Screen Capture: Bitmap graphic capture for quick documentation (.tif).
- OBSTRUCT to indicate inaccessible locations.
- Capacity: 4 GB internal SD card.
- Data Output: USB-C 1.1 to PC & OSX connectivity.
|
TRANSDUCER
- Transducer Types:
- Dual Element (1 to 10 MHz).
- Locking quick disconnect “00” LEMO connectors.
- Standard 4 foot cable.
- Custom transducers and cable lengths available for special applications.
FEATURES
- Setups: 64 custom user-definable setups; factory setups can also be edited by the user.
- Factory setups can also be edited by the user.
- Selectable Transducers: Selectable transducer types with built-in dual path error correction for improved linearity.
- Alarm Mode: Set hi and lo tolerances with audible beeper and visual LEDs.
- Scan Mode: Takes 250 readings per second and displays the minimum reading found when the transducer is removed.
CERTIFICATION
- Factory calibration: traceable to NIST & MIL STD- 45662A.
WARRANTY
|


Reviews
There are no reviews yet.